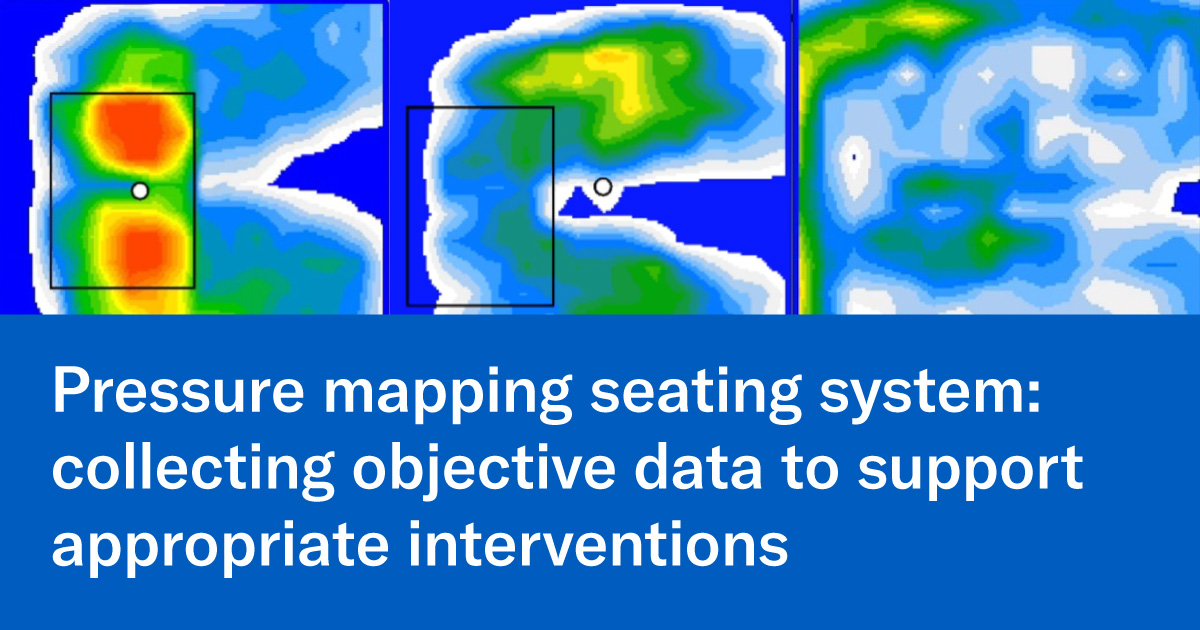
This is part 3 of a series focusing on pressure mapping and pressure mapping systems. See part 1, part 2, part 3, part 4, and part 5.
In today's medical environment, best practice means using objective data to support why we performed an intervention or chose a certain product for a consumer. Justifying our choices to the clients, families, rehab directors, facility and to the insurance companies is a must and proving outcomes is critical. A pressure mapping system gives us the ability to provide data.
To illustrate this point, imagine that you receive a referral from nursing because a resident has a sacral wound that they are having difficulty healing.
During your evaluation, you identify that the client currently:
- is sitting in a K0002 wheelchair with a fixed 90-degree seat-to-back-angle (STBA),
- is using elevating leg rests, causing their femurs to make limited contact with the cushion
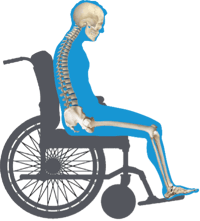
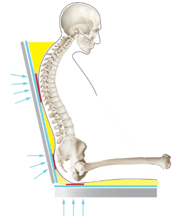
- sits with the original sling back that does not conform to their kyphotic spine
- is using a general use cushion, which does not offer the level of skin protection needed for their presentation.
The first step is…. DON’T CHANGE A THING! Map the client in the seating system as is to get a baseline to compare your interventions and prove effectiveness about your choices. By getting this baseline, we can assess the baseline values such as:
- peak pressure index especially under the sacrum
- contact area (which is how much contact the client’s body is making with the support surface)
- dispersion index (how well this seating system does at distributing pressure away from the high-risk area)
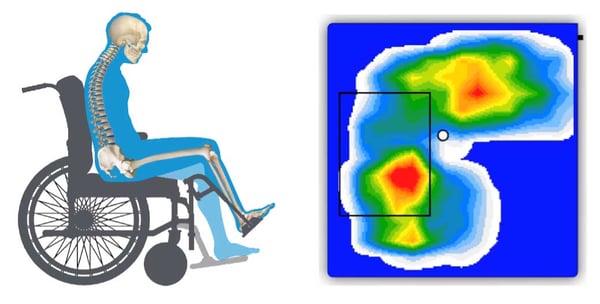 Baseline: the wheelchair system prior to changes
Next: Demonstrates step-by-step how each intervention is working
This gives us a starting point to use as a reference as we start trialing new configurations and support surfaces such as:
- changing the style and position of the leg rests
- changing the sling back to a specialized back support with adjustability to set the chair with the appropriate STBA
- immerse and envelop the spine to take pressure off the pelvis and redistribute it throughout the trunk
With each intervention, repeat pressure mapping until you get the results you need!
|
Intervention 1
Standard leg rests vs elevating leg rests: more Femoral contact |
Intervention 2
Opening STBA to decrease pressure off the pelvis |
Intervention 3
Use of a specialized back support that conforms to the client's spine to decrease peak pressures, increase stability |
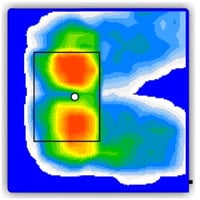 |
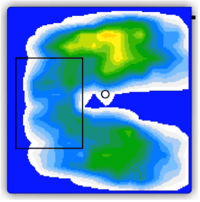 |
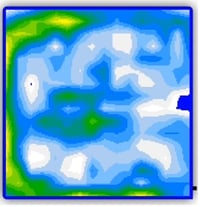 |
With each intervention, repeat pressure mapping to compare results and decide which set up is best to:
- reduce peak pressure under the sacrum
- increase surface contact area throughout the entire gluteal surface and femurs
- redistribute pressure away from the sacrum and more through the femurs and back support
By having the data provided by the pressure mapping system, you now have supporting documentation to submit to the medical team and insurance companies and to use when educating the client and family. Finally, there is proof that the interventions are helping to create a seating system that will assist in healing/minimizing the risk of a pressure injury and allow the client maximal function!
The data helps to justify wheelchair configurations and equipment choices!


 Ana Endsjo, MOTR/L, CLT
National Education Manager - Long Term Care Division
Ana Endsjo has worked as an occupational therapist since 2001 in a variety of treatment settings. She has mainly worked with the geriatric population, dedicated to the betterment of the treatment of the elderly in long term care centers. Her focus has been on seating and positioning and contracture management of the nursing home resident. With this experience, her hope is to guide other therapists, rehab directors, nurses, and administrators through educational guides, blogs, webinars, and live courses in her role as National Education Manager - Long Term
